 Working with OneNote on various devices takes a little getting used to the different environments. Do you work with the client, the webapp or the app. They do have different layouts. Personally I use the regular OneNote client the most. Why… because it fits my needs and it runs on my desktop, laptop and surface pro. I use the web app for reading and small edits. I use the apps mainly for reading everything I add with me(at)onenote(dot)com. So working with the client on different devices can have one small drawback and that is the creation of the various objects. When adding a new notebook, adding a new page, promoting a subpage or adding a section group I find myself all over the place clicking the various options.
Time to change!
When working on a touch based machine I find it more practical to have options all stored in one central place. So when I want to add a new notebook or add a new page I just want to hit a button that says “New…”. That also means that I don’t want to click File first. What I did was create a custom ribbon which holds all the options I was looking for. Now I have all my choices neatly packed together in one extra added Tab in the ribbon called NEW.
Steps to reproduce
If you like to add this to your OneNote ribbon follow these steps.
- Go to File – Options
In the next dialog click – Customize Ribbon
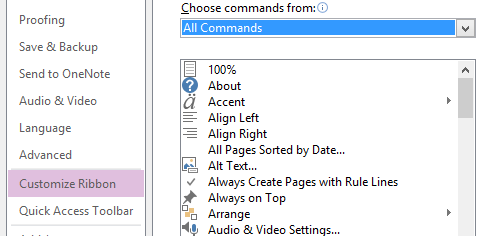 While you are there, choose the All Commands from the combo box that way you can choose the options you are looking for. By default this is set to Popular Commands.
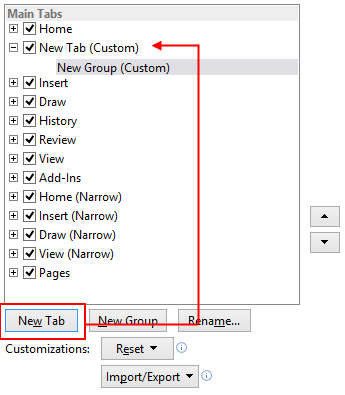
On the right side of the dialog you will see the existing tabs in the ribbon. This is the place where we are going to add our custom ribbon. Click the New Tab button below the box.
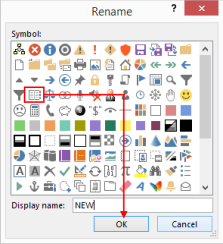
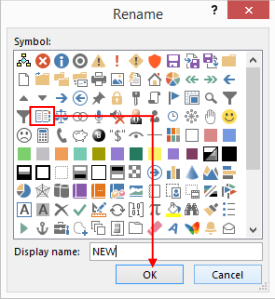
This will create a New Tab (Custom) and a New Group(Custom). There is always a group added. You can not have a tab without a group. Click on the New Tab and click the Rename button. Type in a name of your liking. I called mine “NEW”. Now do the same for the New Group. Click rename and choose a new name for your group. You also have the option to choose a nice picture here.
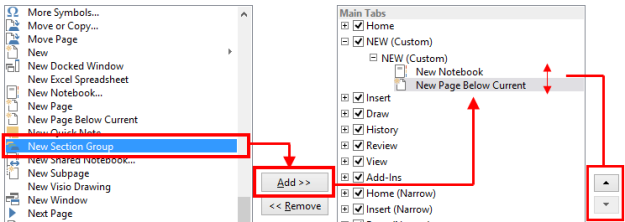
Originally enough i also called this one “NEW”. When done click OK. You will return to the previous option where you can Add options to your group. Make sure the New group is selected. Now we can add the options we would like to add to our own tab. Choose every option you like and click Add
Order by…
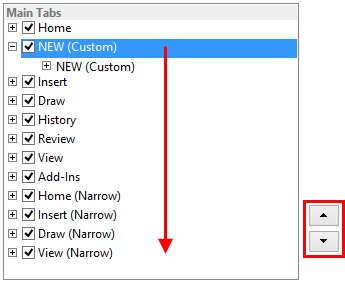
When done adding and viewing you might come to the conclusion that the order of the button is not quite to your liking. The up and down arrows give you the option to set your own order.
Tab in the right place
When all done click OK and view your own customized tab. Cool right? Now I like my personalized tabs either at the beginning of the Ribbon or at the end of the ribbon. Mostly at the end so one final bit of tuning and I’ll be happy.
Ok, all set let’s see the result!
 Yep that’s what I was looking for. Now I can click right from the tab. All options in one place and easily to click on my Surface Pro thanks to the Big Buttons 🙂
That’s a great idea Maurice and useful when working on OneNote that has a ribbon.
Unfortunately I access OneNote across a range of devices and versions: Windows Phone, desktop (Office 2010), Windows 8.1 app, Mac and the Web app. The Office versions are the best for functionality and WP8 the worst.
I do wish OneNote was more consistent across the different platforms.
LikeLike
Alfie, could not agree more!
LikeLike